Build a Serverless Subscription Site with Stripe
In this tutorial, we'll be building out a site that uses Stripe to create a checkout system, then that triggers an AWS Lambda Function provisioned through AWS Amplify which creates a user for the purchaser. Then, the user can log in and see paywalled content! This pattern would work for a membership or course site where you want a user to pay for access to content. You could slightly modify the code to send digital products to customers via email as well!
This tutorial assumes intermediate React, AWS Amplify, and Node.js knowledge, though you could use the Node.js code with any frontend stack.
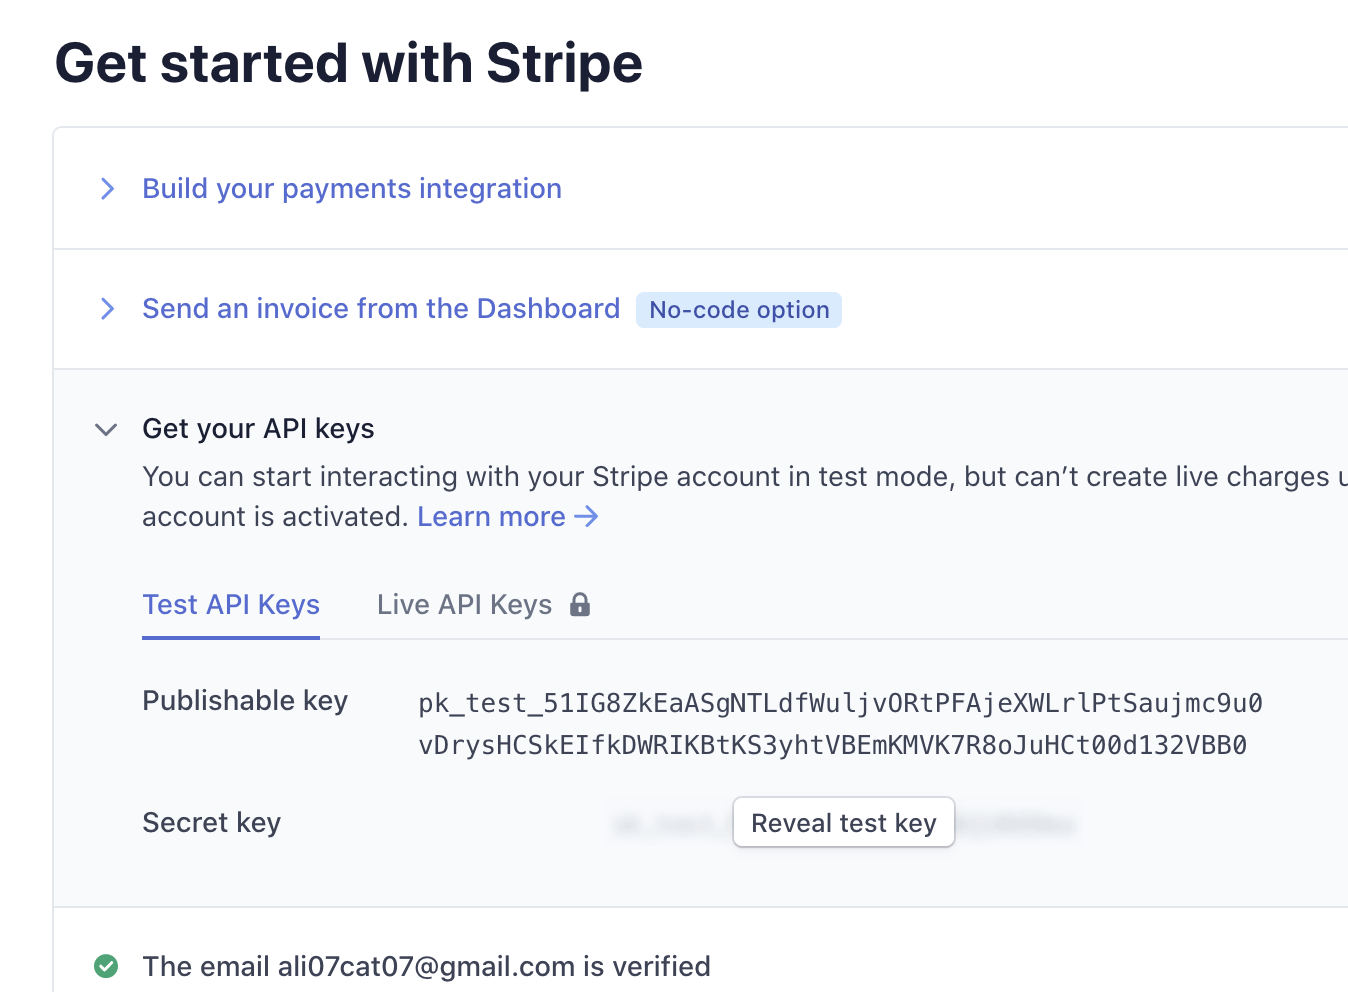
The first step, is to create a Stripe account and confirm your email. You'll need this to generate an API Key. Also, at the bottom of the Checkout Settings page enable client-only checkout. You could implement fullstack checkout if you want to build your own form and such, but this will allow you to move a little faster initially.
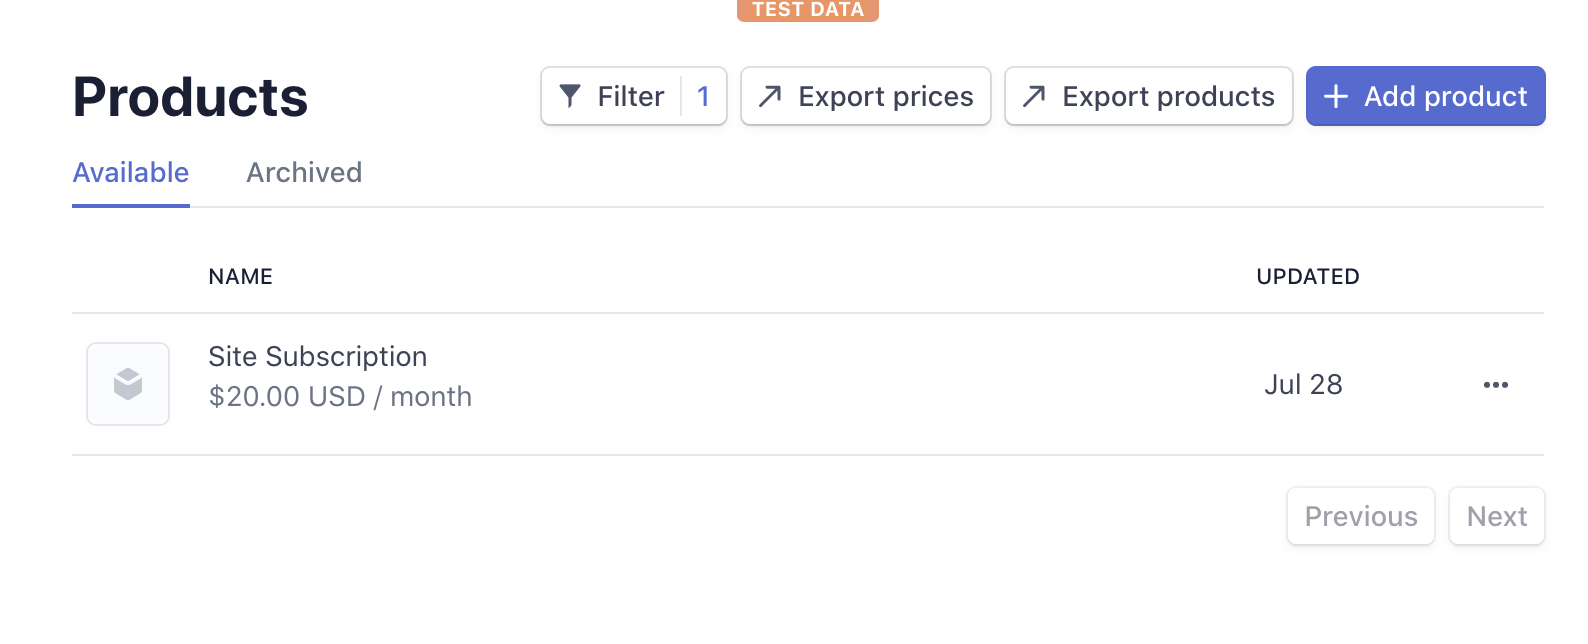
Then, create a product using the Stripe dashboard. On the left-hand navigation, select "Products" then "+ Add product". Fill out the form! I made mine into a subscription that was $20/mo.
Now, create a React app.
npx create-react-app membership-site
cd membership-site
Then install the Amplify libraries and Stripe's JavaScript SDK.
npm i aws-amplify @stripe/stripe.jsClear out the App.js component's return statement so that it just returns an empty <div> for now.
Create two new empty React component files, one named SignIn.js and one called Subscribe.js.
Let's first implement Subscribe.js. Import loadStripe from the Stripe SDK.
import { loadStripe } from '@stripe/stripe-js'
Create a button that fires an event listener on click.
export default function Subscribe () {
  const handleClick = async e => {
  }

  return <button onClick={handleClick}>Get Course Access</button>
}
Inside of that event listener, use the loadStripe function with your Stripe Publishable key as an argument to it. You can find your Stripe Publishable key at the top of the home page under "Get your API Keys".
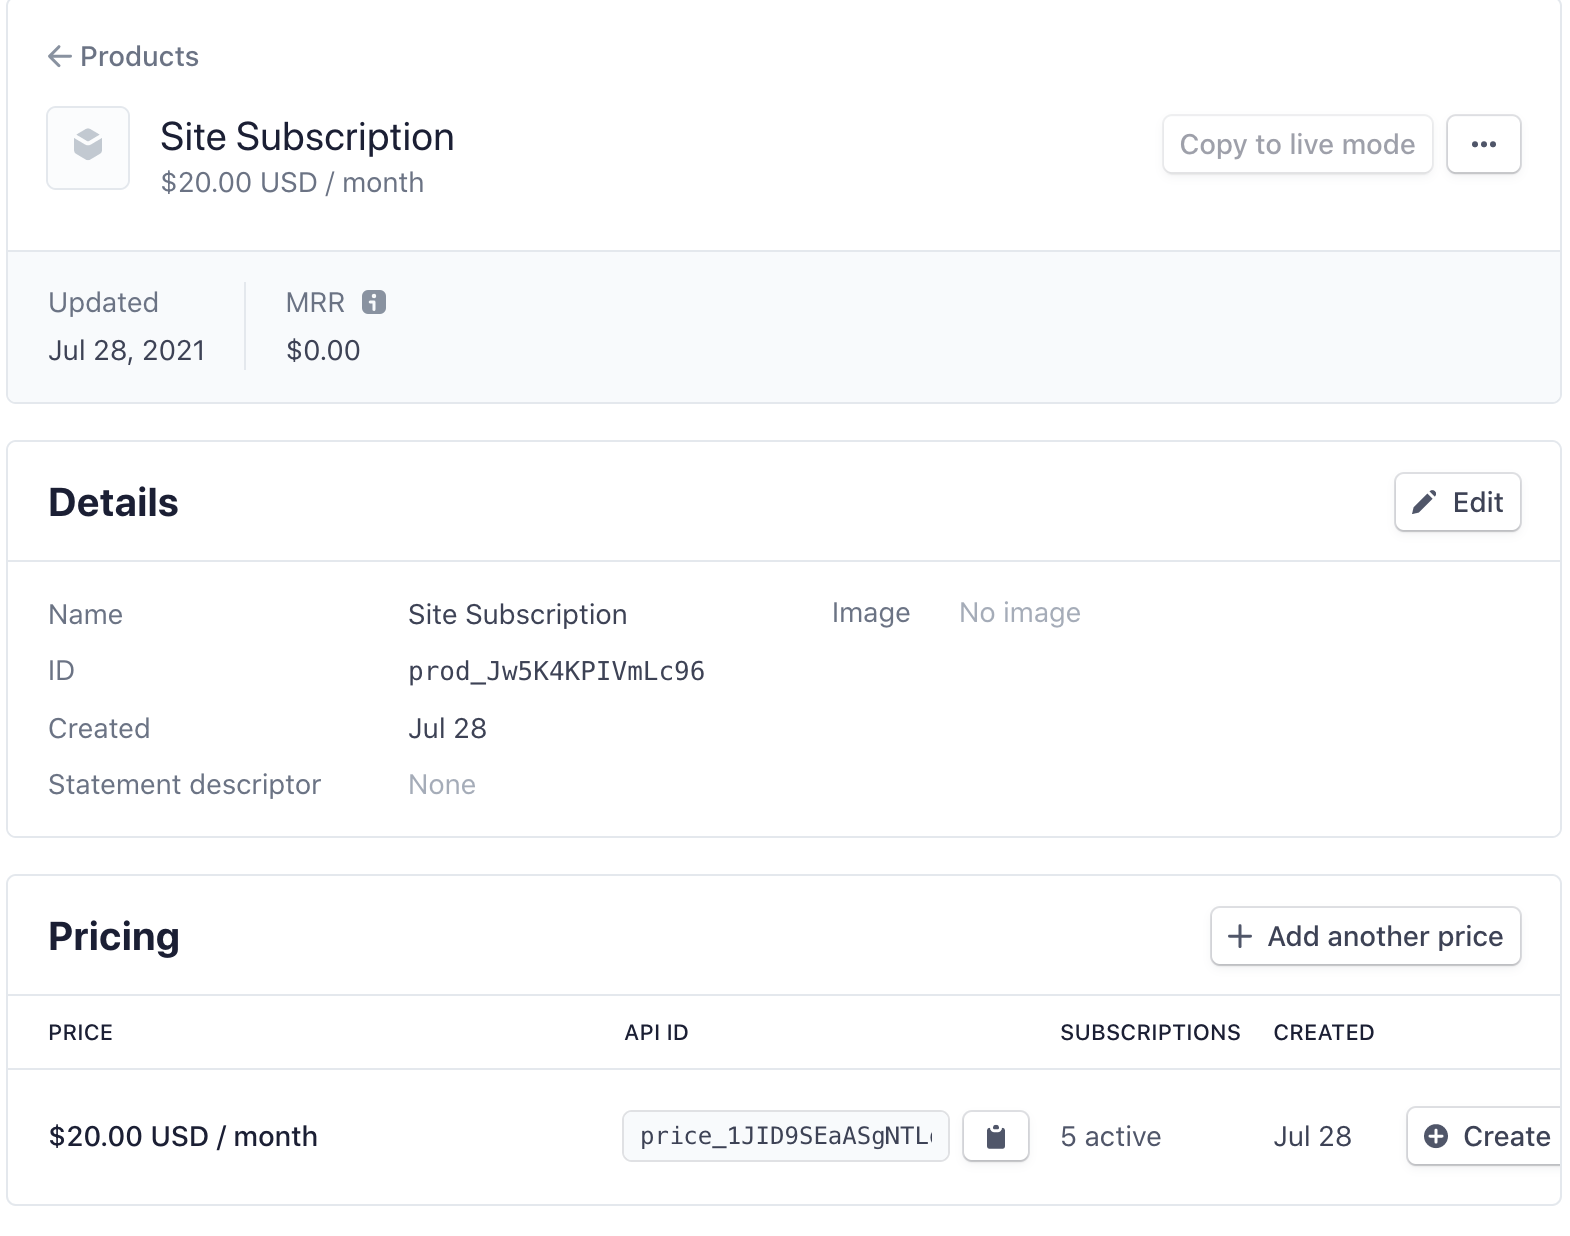
Then, run Stripe's redirectToCheckout method with your information -- first the lineItems. If you had multiple items that the user could choose from, you'd want to implement some sort of cart checkout that adds items and their quantities to this array. In this case, for a simple app, we'll set the quantity to one and use the price key for our item. You can find the price key by going to your product and then copying the API ID next to the price.
If you made your item a subscription, put that as your mode, otherwise use "product" or whatever you created. Then have a success and cancel URL -- I redirected them back to home if they were successful! I didn't implement an error page, but you could.
const handleClick = async e => {
  const stripe = await loadStripe('your_stripe_publishable_key')
  const { error } = await stripe.redirectToCheckout({
    lineItems: [{
      price: 'price_key',
      quantity: 1
    }],
    mode: 'subscription',
    successUrl: 'http://localhost:3000/',
    cancelUrl: 'http://localhost:3000/cancel'
  })
}
Render this component within your App component.
import './App.css'

import Subscribe from './Subscribe'

function App () {
  return (
    <div className='App'>
      <h1>My Fancy Subscription Site</h1>
      <Subscribe />
    </div>
  )
}

export default App
Try this out -- you should be able to "buy" an item using this form! You can use the credit card number "4242 4242 4242 4242" to test Stripe without actually paying. Now we've implemented step one of this tutorial: checkout!
Now let's move on to the webhook handler that will create a new user once the item is purchased.
First, initialize Amplify for your project.
amplify initPress enter to accept the suggested configuration. Then we'll initialize auth.
amplify add authPress enter for each question that pops up to accept the default authentication setup. Now we'll add an API so that the webhook can make a request to a URL.
amplify add apiAnswer the first few questions like so:
? Please select from one of the below mentioned services: REST
? Would you like to add a new path to an existing REST API: No
? Provide a friendly name for your resource to be used as a label for this category in the project: apib104bfb8
? Provide a path (e.g., /book/{isbn}): /webhook
Then, we'll also create an AWS Lambda function. Answer this set of questions with the following:
? Choose a Lambda source Create a new Lambda function
? Provide an AWS Lambda function name: stripedemofunction
? Choose the runtime that you want to use: NodeJS
? Choose the function template that you want to use: Serverless ExpressJS function (Integration with
 API Gateway)
We do want to enable advanced settings for this project. Answer yes to that question.
? Do you want to configure advanced settings? YesFirst, we'll want to access auth from our Lambda function.
? Select the categories you want this function to have access to. auth
? Select the operations you want to permit on stripedemo: create, read, update, delete
Answer no to the following three questions:
? Do you want to invoke this function on a recurring schedule? No
? Do you want to enable Lambda layers for this function? No
? Do you want to configure environment variables for this function? No
We will; however, configure secret values that our function can access. For your secret name, choose "stripe_key" and then enter your Stripe secret key. This will be under where you found your Publishable key above -- you'll have to click "Reveal test key" to see it.
? Enter a secret name (this is the key used to look up the secret value): stripe_key
? Enter the value for stripe_key: [hidden]
? What do you want to do? I'm done
Then run amplify push to deploy all of your provisioned resources to the cloud!
Change into the directory that your function is located in and install the AWS SDK and the Stripe Node SDK.
cd /amplify/backend/function/stripedemofunction/src
npm i aws-sdk stripe
Now we get to write the logic!
First, delete everything below the comments in your app.js file for your Lambda function and then paste in the following. Most of this will already be in the file. It will set up Express for your serverless application.
const express = require('express')
const bodyParser = require('body-parser')
const awsServerlessExpressMiddleware = require('aws-serverless-express/middleware')
const aws = require('aws-sdk')

// declare a new express app
const app = express()
app.use(bodyParser.json({
  verify: function (req, res, buf) {
    req.rawBody = buf.toString()
  }
}))
app.use(awsServerlessExpressMiddleware.eventContext())

// Enable CORS for all methods
app.use(function (req, res, next) {
  res.header('Access-Control-Allow-Origin', '*')
  res.header('Access-Control-Allow-Headers', '*')
  next()
})

app.listen(3000, function () {
  console.log('App started')
})
Now we'll write a function that will retrieve our Stripe secret key. If you look at the top of your app.js file you'll see this already generated there!
const getStripeKey = async () => {
  const { Parameters } = await (new aws.SSM())
    .getParameters({
      Names: ['stripe_key'].map(secretName => process.env[secretName]),
      WithDecryption: true
    })
    .promise()
  return Parameters[0].Value
}
Now we'll create a route that will handle a post request to the /webhook route that we setup.
First we'll get our Stripe key and then configure Stripe to use it. You would also want to make sure the request is properly signed from Stripe in a production app.
We'll use the customer id that's sent to us in Stripe's request body to get the customer's email.
Then, we'll instantiate the AWS Cognito SDK and use it to create a user with the admin API. You can get your UserPoolId in the comments at the top of your the app.js file. It will be slightly different than the one in my code.
Then, we'll make sure that the user account is sent via email and uses that email to create the account.
If we're successful, we'll send a 200 response.
app.post('/webhook', async function (req, res) {
  const stripeKey = await getStripeKey()
  const stripe = require('stripe')(stripeKey)
  console.log(stripeKey)

  const customer = await stripe.customers.retrieve(
    req.body.data.object.customer
  )

  const userEmail = customer.email

  const cognito = new aws.CognitoIdentityServiceProvider({ apiVersion: '2016-04-18' })

  cognito.adminCreateUser({
    UserPoolId: process.env.AUTH_STRIPEDEMO1C66A4D4_USERPOOLID,
    Username: userEmail,
    DesiredDeliveryMediums: [
      'EMAIL'
    ],

    UserAttributes: [
      {
        Name: 'email',
        Value: userEmail
      }],
    ValidationData: [
      {
        Name: 'email',
        Value: userEmail
      }
    ]
  }, function (err, data) {
    if (err) console.log(err, err.stack) // an error occurred
    else {
      console.log(data)
      res.sendStatus(200)
    } // successful response
  })
})
Now we need to trigger the Lambda function whenever a user completes a purchase. We'll first need the URL for the app. If you go into your aws-exports.js file which is in your src/ directory, you'll see an endpoint key. For example, mine looks like this "https://rw7cx5fyn3.execute-api.us-east-1.amazonaws.com/dev". Also, add /webhook to the end of the url, for example "https://rw7cx5fyn3.execute-api.us-east-1.amazonaws.com/dev/webhook".
Then, go into your Stripe Dashboard and click "Developers" on the left-hand navigation. Then click "Webhooks" under that. Click the "+ Add endpoint" button on the top right. Paste in your URL from above and then choose "payment_intent.succeeded" as the event to listen for.
Your event should work! Test out checkout again and then check your email for a login!
Now for the presentational code -- let's add a sign in form and then render some paywalled content once they are!
In your <SignIn> component, add the following React form that triggers Amplify's sign in method once submitted.
import { useState } from 'react'
import { Auth } from 'aws-amplify'

export default function SignIn ({ setUser }) {
  async function logIn (e) {
    e.preventDefault()
    try {
      const user = await Auth.signIn(username, password)
      setUser(user)
    } catch (error) {
      console.log('error signing in', error)
    }
  }
  const [username, setUsername] = useState('')
  const [password, setPassword] = useState('')
  return (
    <form onSubmit={logIn}>
      <input type='text' placeholder='username' onChange={e => setUsername(e.target.value)} />
      <input type='password' placeholder='password' onChange={e => setPassword(e.target.value)} />
      <input type='submit' value='log in' />
    </form>
  )
}
Now we'll finish up the App component! We'll create a user state attribute that is updated once the user signs in. We'll render paywalled content if the user is signed in, otherwise we'll show the sign in form.
import './App.css'

import Subscribe from './Subscribe'
import SignIn from './SignIn'
import { Auth } from 'aws-amplify'
import { useState } from 'react'

function App () {
  const [user, setUser] = useState(null)
  return (
    <div className='App'>
      <h1>My Fancy Subscription Site</h1>
      <Subscribe />
      {user
        ? <h1>Paywalled content!</h1>
        : <SignIn setUser={setUser} />}
    </div>
  )
}

export default App
If you want to take this demo down, you can run amplify delete to deprovision the cloud resources!
And we're done! In this tutorial we created a Stripe checkout system that triggers an account being created. Once signed in, a user can view paywalled content! If you have any feedback on AWS Amplify or this tutorial, please let me know!